


|

|

|

|

|

|
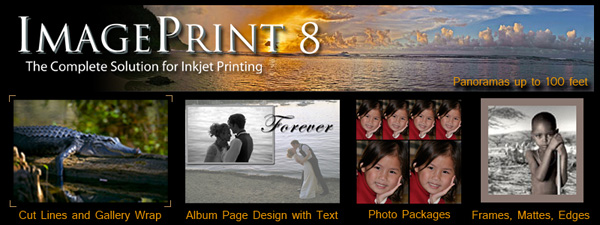
ColorByte Software’s ImagePrint 8—Printing Gone Easy
This is a guest editorial by fine-arts photographer Pete Myers of Santa Fe, New Mexico. Pete has long in experience in making fine art prints, and shares his latest experience here.
Pete’s View
ColorByte Software’s ImagePrint 8—Printing Gone Easy
By Pete Myers
www.petemyers.com
As a fine arts photographer, my print quality is the most important aspect of my work. The print is what my clients purchase, hang on their walls, and has my signature on it. And before my signature goes onto a print, the print itself has to embody the radiance and the intent of my work as an artist.
So it may come as a surprise to many that I do not take a long and argentous approach to printing my images with esoteric print profiles created of my own accord. Instead, I have been using ImagePrint by ColorByte Software (www.colorbytesoftware.com) to do the heavy lifting in my printmaking—and ImagePrint does so with astonishing accuracy, and without pain and suffering.
Whether you’re a fine arts photographer, commercial photographer, or just an advanced hobbyist, getting your print to look right is an important aspect of your work. All photographers should consider ImagePrint as an important potential asset in their photography equipment arsenal. ImagePrint is not just for fine arts photographers, but rather it is the fact that it can be used in this field of photography with great success that underscores the incredible image quality obtainable with this program.
I started using ImagePrint at Version 6. ColorByte just released Version 8, and I would like to share with you some of its benefits towards my work that I have seen over the years—and perhaps you, too, will find ImagePrint of interest towards your own efforts.
Image print and printers
ImagePrint was designed to work with Epson printers and runs on either Mac or PC. A license for ImagePrint is specific to the size of the Epson printer that you own. It is a secure program, requiring a license dongle to be attached to your computers’s USB port.
ImagePrint elegantly takes over the print function of your Epson printer. It literally bypasses the internal software that Epson uses for printing and actually controls the printheads directly, making up a new and precise function of printing, ink drop by ink drop. With ImagePrint attached to your Epson printer, it is like “turbo charging” all aspects of the printer itself—and very much like having a new printer. In my findings, ImagePrint delivers a final print that is vastly superior to what can normally be accomplished with a stock Epson printer.
Full color space
Further, ImagePrint delivers the full color space of your printer’s inkset, with most Epson printers now exceeding Adobe RGB 1998 color space. One of the dirty little secrets of the photo industry is that there are currently very well-known photography post-production programs that mute down the final output of your photographs using print drivers designed for sRGB color space only—which is about half of Adobe RGB 1998. ImagePrint delivers the full Adobe RGB 1998 color space and beyond, depending on your specific printer and inkset.
Demo version and trial
But don’t take my word for it—try it for yourself! A demo version of the program can be downloaded from ColorByte, and you can test ImagePrint with your own printer. The only caveat is that it will stamp the printed image with a giant “DEMO” tag across the print. But it should allow you to compare your current print quality to what ImagePrint can accomplish.
ColorByte has a wonderful unconditional 30-day money-back guarantee should you purchase the product and want to test it more extensively and without the big “DEMO” tag across your image. There are some slight restrictions on the guarantee, so check the details on its site. But I have always found ColorByte to be very generous in its business relationships. It wants you to be happily making prints of superior quality, and trying out their program is one of the best ways of getting there.
Calibration and tutorials
ImagePrint works by selecting a paper profile that matches your printer, ink, and paper combination. This is one of the strengths of the system in that ColorByte can create a calibration profile based on very advanced technology that far exceeds what can be accomplished by end users. Paper production (and Canvas) has advanced to such reliable methods of manufacturing that most papers will perform extremely close from batch-to-batch.
The extensive ColorByte tutorials show you how to acquire the right profiles for your work and load them into ImagePrint; but suffice it to say that it’s very easy to do. There is “Profile Manager” software that will help you FTP the correct profiles to you and ImagePrint.

Getting started
I have a few recommendations to get started. First, most LCD monitors are far too bright to accurately depict an image that will hang under gallery lighting (450 lux at the surface). Indeed, the specifications for Adobe RGB 1998 are for brightness at 160 nits. Use about half this value in your monitor calibrations—80 or 90 nits. I personally use the Adobe RGB 1998 color space, but at 90 nits and at a 300 to 1 contrast ratio.
Also, on the “Color Management” setup page in ImagePrint, set the “Black Point” to 50% under “Output” to start your print evaluation. This is the “normal” setting, and should be moved towards 100% to bring up the values of the prints’ low zones or down towards 0% to darken those zones. The black point is used to adjust the lower zones in the final print without disturbing the original print file. For example, if you composed your image in a very dark room with a bright LCD monitor and have huge contrast in the original print file, but want to print on a low contrast paper, compensation can be set. This is especially helpful if you are printing on matte paper or canvas.
Paper and canvas
The current paper that I use for my work is Ilford Galerie Gold Fibre Silk, which is a baryta-coated surface in the tradition of fine photographic papers. It provides superb print quality, easy handling, and is cost effective. In ImagePrint, I use two different profiles with this paper depending on my printing needs. I use a color version at 2880 dpi with tungsten lighting for my color prints, and a black and white version at 2880 dpi for my monochrome work.
If you are printing on canvas or a rougher surfaced paper, ImagePrint has unique capability in providing four and eight pass printing at 1440 dpi. In this mode, the print heads will make four or eight passes over the same print area and gradually build up the ink to make the image. The dot size for each drop of ink is modulated, as well as its exact placement. In so doing, it creates far more precision and uses far more dots of ink to slowly build up the image while it absorbs into the print surface. Try it!
In 2880 dpi mode, the print method is more direct, but still gradually builds up the image on the paper across the printhead. You can observe the print process on your printer and see how the image is slowly built up across the printhead. By controlling the amount of ink that is applied at each stage, there is more subtlety to, and exactness in, the final print. For me, this is critical in making a fine art print, especially in regard to precision in the lower zones of the image in my monochrome prints.
Editor’s note: not every printer/paper/ink combination has a 2880 dpi profile; ask ColorByte directly.
Monochrome printing
Monochrome printing is unique with ImagePrint. Within the monochrome print function, the user can create a split tone print using the monochrome paper profile. I use this function all the time, and it works extremely well. My original files are all pure monochrome, grayscale images. But within ImagePrint, I can add a split tone tint to the upper and lower zones, and set both the color of the tints and the crossover point with great precision. I find that I can make platinum-like split tone prints that really enhance the look of the final print without being overt to the viewer.
Color profiles and papers
While ColorByte has 27,000 profiles for over 400 paper types in its profile system, do not worry if your needs are unique or a new paper comes out with your name written all over it. Just contact ColorByte, provide samples, and it will rapidly make profiles on its precision system. Most users will never need this level of help, but it is good to know that it is there should you need it. Epson printers are calibrated before they leave the factory to be exact from machine-to-machine, so there is little worry that your printer will be different from the ColorByte calibrations—one of the reasons that it sticks with Epson.
Templates, borders and crop marks
If you are producing prints for a living, ImagePrint is invaluable. For the advanced user, simple to use templates are available or easily made up that allow you to just click, drag, and stuff in your master images into literal spaces on a page to gang up prints. This allows you to print mixed-sized prints within seconds (or even different images at mixed size). This is a wedding photographer’s dream, but anyone who must print mixed-sized prints on the same sheets or rolls of paper will be in heaven.
And yes, ImagePrint can surround your image with unique borders if so needed—all without touching the original image file.
The print tool I like the most is in regard to putting on crop marks to the final print. It could not be easier. You can readily select if you want the crop marks to go inward or outward from the corners of the crop. You can set the size and length of the crop marks. But the feature I like most is that you can also specify different crop mark spacings for the top, bottom, and sides. This is a huge benefit to those of us making fine art prints wherein there is “weight” in the matting and framing process. For example, I might want a half-inch of floating space around the top and sides of the image, but three-quarters of an inch on the bottom to make room for a signature. It is so easy to use that you cannot believe that this function has not been seen before.
IN STOCK!
For Sony mirrorless or Leica L.
Conclusions
Printing should not be a torturous and uncertain task for the photographer. ImagePrint 8 lifts the burden of printmaking from the shoulders of the photographer and delivers print quality unrivaled. What you see on the screen on your calibrated monitor is what is delivered to the surface of the print. With the right lighting, the images produced by ImagePrint 8 are every bit as luminous and radiant in the gallery as what was seen on the screen—a true joy to see your work hanging on the wall looking “right.” Try ImagePrint 8 and see for yourself.
FTC Disclosure Notice: ImagePrint 6 was purchased by the author at full price. Subsequent upgrades have been provided courtesy of ColorByte in exchange for beta testing.

