$220 SAVE $130 = 37.0% Western Digital 16.0TB Western Digital Ultrastar DC HC550 3.5-in… in Storage: Hard Drives
|
|

|
|

|

|

|

|

|

|

|
Hyper Utility Software
Installation
The Fujifilm representative gave me the CD-ROM, and I installed the Fujifilm “Hyper-Utility” program using that CD. The first poor choice to the user interface was the name: what does the name “Hyper-Utility” have to do with processing Fuji raw files? Consider the names “Nikon Capture”, “Digital Photo Professional”, “Adobe Camera Raw” and “Capture One”. A good product starts with a good name. At least those names suggest something about photography or raw-file processing.
The apparently hastily-designed installer required the Mac OS X administrative password with no explanation of why it was required, or what was to be installed. Asking for the administrative password is always worrisome in that some specialty software might be installed (eg a kernel extension), potentially putting system stability at risk. Because the installer says absolutely nothing about what’s to be installed (or afterwards, what has been installed), this is particularly egregious. The lack of an uninstall makes it downright annoying. I could find no “uninstall” option in that installer.
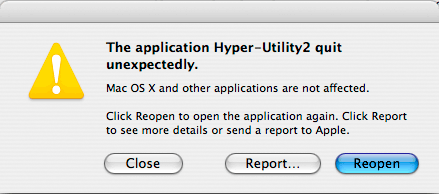
The crude installer installed 2289 items (“Installer was successful”). There was no mention of where these items had been installed, what had been installed, or even the name of the program that had been installed. Attempting to run the application resulted in a crash every time:
Next I downloaded “Hyper-Utility Software HS-V2 Ver.3.1H Updater for Mac OS X”. Some minimal progress in modernizing the install was apparently made, because the updater is delivered as a disk image (“dmg”) file (“V2XE31H.dmg”), my preferred approach, excepting the name.
The name of the updater application was also made as obtuse as possible: “V2XE31H.app”—what is this, 8.3 file naming a la Windows? This is also just stupid from a technical support perspective; I can’t even pronounce the name without going cross-eyed. One can hardly expect a good user experience from software whose very name the engineers apparently thought was too much trouble to design—yes design—good names take careful thought. That’s why companies pay untold sums and still end up with really idiotic names for their products—like the “Chevy Nova” in Spanish-speaking countries (“No go” or “It doesn’t go”).
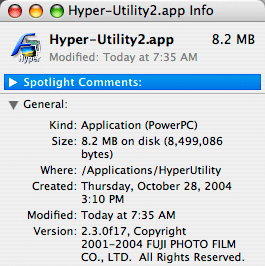
I did not follow the updater’s antiquated advice to “quit all programs”—what is this, Microsoft Windows? The updater first removed everything that I had just installed, then proceeded to slowly install 2859 items, finally concluding with an “Installer was successful” message. As with the original installer, no mention was made of what had been installed, or where. I was rewarded for my efforts with exactly the same version number I had started with (2.3.0f17—see below)!
After installation, Mac OS X Finder had no idea that the newly-installed software was the “right” application for the S3 Pro’s “RAF” image files. This is a job for the installer to do, and the engineers obviously skipped that task. Here is the final version info for the installed Hyper Utility:
Using Hyper-Utility2
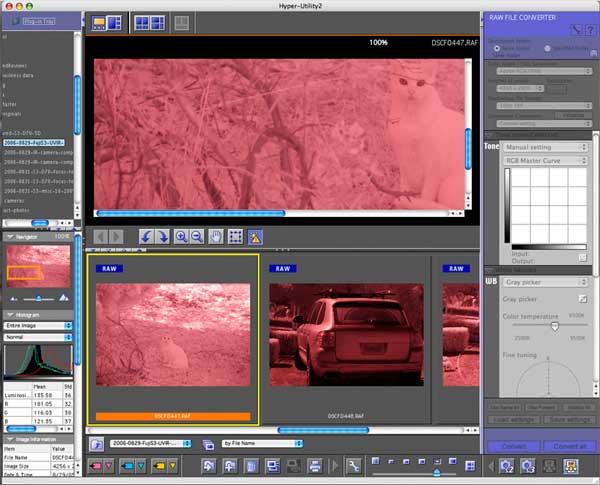
After all this effort, I was able to launch Hyper-Utility2. You are greeted with a quite small window (I’ve made it still smaller for screen-shot purposes). On a 30" monitor, it took up about 1/3 of the screen.

Issues
I noticed a few issues right away, just trying to do basic operations:
- Drilling down the folder hierarchy required manually expanding the width of the pane. If you don’t do this, the left side is cut off when you re-launch the program;
- The scroll button on my Might Mouse didn’t work;
- Holding down a modifier key (command or option) won’t change the zoom-in cursor to zoom-out, nor does holding the space bar down yield the drag-cursor for hand-scrolling. Photoshop users will find this very frustrating (as I do). One must click on each tool individually;
- The interface is so “noisy” (too much use of color) that it’s distracting to the central task at hand: processing images;
- Switching between a vertical and a horizontal layout does not yield the original layout; it changes things you had set!
Wither white-balance?
After 5 minutes of not finding any means of setting a white balance, I resorted to the built-in help.
Searching for “white balance” yielded nothing helpful, which is rather odd, since white balance is the #1 thing to use with a RAW file (for me at least). I finally figured out that I had to click the lower right “RAF” icon to get the controls to appear. I suppose this is OK once the user realizes it, but it’s poor design to hide critical features. After I clicked that icon, it eliminated my preview and I had to re-select, and re-zoom to where I had just been. That was not an anomaly...
I used the “” to set a white balance. Then I modified the , which obligingly reset the white balance I had just set. This was all fairly sluggish. I redid things, re-selecting, re-choosing white balance, etc.
Finally, I clicked “”. After converting, it obligingly deselected the image I had selected, and blanked the preview area, so I had to re-select and re-zoom it. This time, it restored my zoom level, but it made the , and controls inoperable (grayed-out). So I clicked the RAF button again, which de-selected the image. So I re-selected the image, but the controls were still inoperable (grayed-out).
At this point I gave up, preferring to spend my time more productively. I did compare the Hyper-Utility2-converted image to the same one converted using Adobe Photoshop CS2’s Camera Raw, and could find no quality advantage from the Hyper Utility software; aside from a disagreement on white balance and tonal curve, they were for all purposes identical.
Skip this half-baked software and use Camera Raw or one of the other 3rd-party raw-file converters. Fuji marketing responded to this criticism as follows:
You may [sic] not like the software, but your advice may [sic] not be the best for forensic applications and long exposure applications. 3rd party converters miss key channel data and often add unwanted dark noise to the image. We are now trying to work with some of these 3rd party companies for the future...
By all means—perform your own tests. I do think that most users will be disappointed with HyperUtility, but if it can produce superior results, it might be worth it—test it for yourself and come to your own conclusion.
Seagate 22TB IronWolf Pro 7200 rpm SATA III 3.5" Internal NAS HDD (CMR)
SAVE $100


