


|


|

|

|

$200 Leica BP-SCL6 Lithium-Ion Battery (8.4V, 2200mAh) BACK IN STOCK in Accessories: Batteries and Power
|

|
Proto Machines LED8 Full Color LED Light, Painting at Night with Light
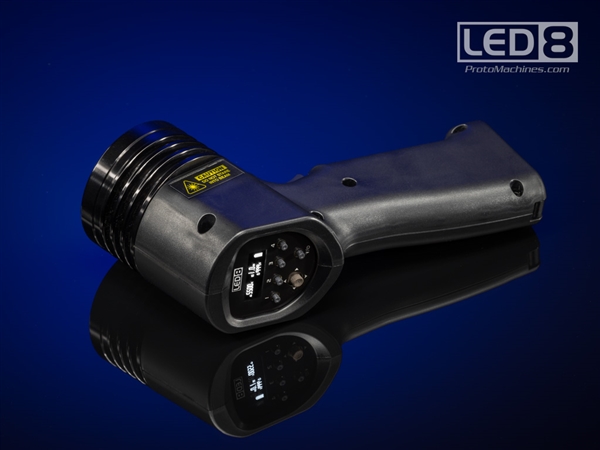
The Proto Machines LED8 is a full-color handheld LED light with top-grade engineering. Running off batteries and offering a infinite array of color choices (including white light), it can be used for speciality lighting of many kinds, but is particularly fun to use at night, where imagination is the limit.
Build quality and design is impressive—this is pro-grade gear that I’d love to have in my bag. The trigger-operated on/off for light emission works great and in my view is much superior to other alternatives; this fits in the hand neatly and easily slips into a large pocket, so it is very convenient for outdoor use.
Key features:
- Adjustable hue over 0-359° range in HSB color space.
- Adjustable saturation over 0-100% range in HSB color space.
- Color modes HSB (adjust hue over 360° range and saturation over 0-100% range).
- Output power over 1.0 to 8.0 range in 1/10 stop increments.
- Simulated white balance from 2500°K to 9500°K
- Adjust hue cycling rate during auto hue cycle mode.
- Exposure timer in 1 second increments, or ---- to disable.
Saddlebag Road overlook
Color modes:
- HSB mode: adjust hue over 360° range and saturation over 0-100% range.
- Hue Cycle: hue cycled automatically at a tunable rate whenever LED output is switched on.
- HSB (RAW): maximize light output for general illumination. Not balanced for photo/video use.
- White: Simulated white balance output, adjustable from 2500°K to 9500°K.
Operating specifications:
- Input Power: 7.4DC, 10 watts
- Power source: 2 X 18650 LiIon
- Ambient temperature: 32°F - 122°F / 0°C to 50°C
- Humidity: 85% or less
- Dimensions: 8 X 4 X 2.5 inches / 203 X 102 X 64 mm
In use
Due to my March 2018 concussion, I waited some time before doing some night shooting—I cannot tolerate staying up late more than very infrequently so many nights my brain said “sleep”, and I followed instructions.
Being entirely new to the Proto Machines LED8 and not having much experience with light painting, my usage was straightforward, but enough to thoroughly impress me with the potential of the device, and also its well thought-out design and excellent build quality. Not to mention observing just how sophisticated one could get with intensive usage over time—experience and imagination are in high demand when using a device like this.
Operating
The LED8 is turned on or off by pressing or holding the small power button. The small but extremely high quality on the back of the unit displays the settings and status.
The most basic usage is pressing one of the preset buttons to choose a color preset, the pulling the trigger to activate light output, or to stop it. The grip offers excellent ergonomics and to me very natural and easy to use and would be eminently usable with thick gloves. The preset buttons are very small however. While not an issue with bare fingers, the gloves will have to come off to use the preset buttons.
Each preset can be programmed to a specific hue saturation and brightness, but for my testing I stuck with the pre-programmed primary colors (red, green, blue).
One thing I failed to realize at first is that pressing the on/off button toggles the LED display on or off. This is a very important point, because if the LED is on, it will leave streaks in the picture if the LED is facing towards the camera.
Beam coverage
Beam coverage is nicely smooth without any hot spots. However, it is a brighter circle which smoothly fades off to a much larger circle. Continuous movement for painting the subject is likely to be best so that no hot spots develop—experience will surely help a great deal for that.
Lenses
I would strongly recommend a highly corrected lens for light painting with garish colors, such as Zeiss Otus lenses, because a lens having chromatic aberrations may spoil the details with haloes and color fringing (if more than one color is used across any edges/boundaries, and reduced resolution in some colors.
Examples
Subscribers should login first so that full resolution images are available.
Bayer matrix cameras like the Nikon D850 have 1/4 of the resolution in the red and blue channels and 1/2 of the resolution in the green channel. Thus an image illuminated by a primary color will be of relatively low resolution. Unconventional cameras with true color sensors should be spectacular for light painting (assuming one with low noise comes to pass), but I had no such camera available.
These images are the very first images that I made with the Proto Machines LED8. Indeed they are my first real light painting images, as I’ve never before had such a tool to try.
Noise: I neglected to enable LENR (long exposure noise reduction) on the Nikon D850 (partly to keep the time requirements down), but I was disappointing in the level of noise and hot pixels without it. It cannot be corrected without smearing detail, so I have not corrected for it.
The images here are displayed in the ProPhotoRGB color space because they clip in the AdobeRGB or sRGB color spaces. A web browser that uses color spaces properly is required in order to see the images properly. A wide gamut display is mandatory to see most of the color range, such as the NEC PA302W or 2017 iMac 5K or 2017 iMac Pro. Even so, some of the colors cannot be fully displayed on any existing display that I am aware of.
Up to 64TB @ 12500 MB/sec!
Mac or PC.
Ideal for Lightroom, Photoshop, 8K video, data analysis, etc.

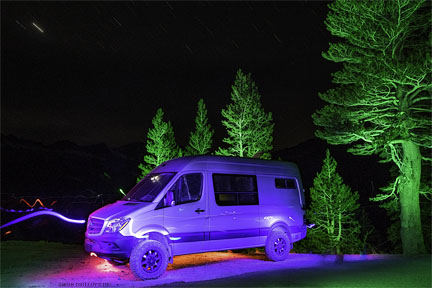
Sprinter van at Saddlebag Road overlook #1
This was my very first image where I painted with light with the LED8. As can be seen I had not turned off the LED panel on the unit (swirls at left).
Read all about Lloyd’s Mercedes Sprinter photography adventure van.
NIKON D850 + Zeiss Otus 28mm f/1.4 APO-Distagon
[low-res image for bot]
Sprinter van at Saddlebag Road overlook #2
This was my second image where I painted with light with the LED8. I still had not turned off the LED panel on the unit (swirls at left). While I mostly avoided swirls of light on the right, I created some shadows somehow.
Experience will help with this, but I overexposed the rear window; I had wanted a spot of green but it was too much range between the window and the silver paint of the van around it.
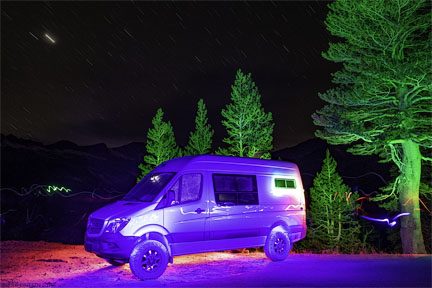
NIKON D850 + Zeiss Otus 28mm f/1.4 APO-Distagon
[low-res image for bot]
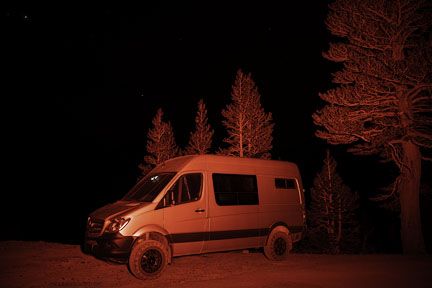
Sprinter van at Saddlebag Road overlook #3
Getting better at not introducing unwanted streaks, but while painting with red I messed up.
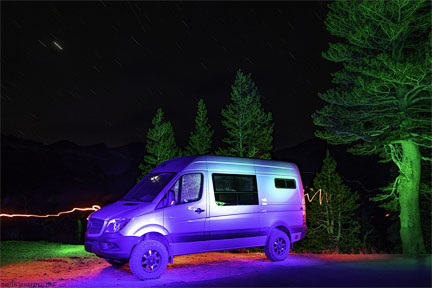
NIKON D850 + Zeiss Otus 28mm f/1.4 APO-Distagon
[low-res image for bot]
Sprinter van at Saddlebag Road overlook #4
I warned the family in the other camper van in advance that I might be waving around colored lights. They did not seem to wake up from what I could tell!
Clouds in the sky obscured the stars a bit, but that blow in the middle is the Milky Way.
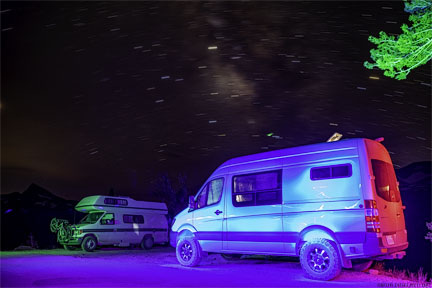
NIKON D850 + Zeiss Otus 28mm f/1.4 APO-Distagon
[low-res image for bot]
Primary color output
The images that follow show the primary red/green/blue preset colors. Toggle to compare.
Sprinter van at Saddlebag Road overlook
I found that white is not very neutral; I used a color temperature of 5900°K but a tint of +37M in Photoshop/ACR raw conversion. In other words, white light from the LED8 is tinted strongly green. There might be a way to design a preset for white that neutralizes some of the greenish tint.
Toggle to compare.
Conclusions
I really liked working with the Proto Machines LED8; I’d love to own one and have it available at all times. It is a very well engineered unit that is easy to use and exceptionally versatile.
Proto Machines also makes the Radium, a wand-style lighting with similar capabilities. What I like about the Radium is that its longer row of LEDs can produce a broader swatch of lighting than the LED8, the LED grouping its LEDs in a relative small light head.
Having both units is probably a must for anyone serious about light painting. Dual units allows two people to paint, or one light to be put in a location of backlighting or similar and so on.

