EXCERPT page containing first few paragraphs. 2024-04-16 20:57:27
UA_SEARCH_BOT_null @ 52.15.63.145
For full access, subscribe here. Or click title to login. ![]()

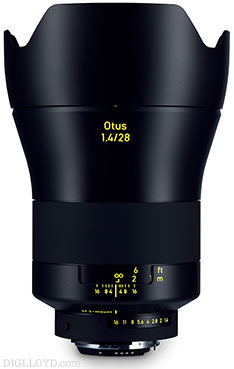
Otus lenses are deal for focus stacking
General Shooting Tips for Focus Stacking
Keep it simple when possible: for shots in which the subject matter is in medium to far range: shoot 2 or 3 frames at f/9 or so. Shoot 2 or 3 frames for wide angle lenses at f/8 or so, 3 or 4 frames at f/9 - f/11 for a deeper range of focus and/or longer focal lengths.
Shoot an image stopped down conventionally as a backup image. Then shoot the stacked images. For example, if the stacked images are to be shot at f/5.6 or f/9, first shoot an extra image at f/9 or f/13 as a standalone image. If the stacked shots prove nettlesome, the single image is a fallback plan, and it can also be used as part of the stacked set.
- Use manual exposure or aperture priority for frame-to-frame consistency.
- Since motion such as moving leaves/branches/grass is problematic for focus stacking, always shoot a conventional frame to have “in the bag”, so it can be used if the stacked image proves to be problematic.
- Manual focus allows the best control over how focus slices through the scene for each frame. Autofocus can be troublesome since it requires subject matter at suitable distances for refocusing (and some cameras have significant errors!). A few cameras offer useful focus bracketing features that can be useful.
- Learn the focus spacing that tends to work well at any particular distance. For example, the focus spacing for f/9 for medium distance scenes versus closeup. Knowing what works can speed up the focusing process by allowing direct use of focusing distance marks.
- For maximizing depth of field and minimizing blur overlaps, choose an aperture like f/8 or f/9 for full frame cameras. This helps minimize blur haloes, thus keeping retouching hassles down as well as requiring fewer frames.
- Field of view and distortion can change with focus; zoom lenses tend to be troublesome. Choose high quality fixed focal length lenses that avoid changes in these behaviors with focus, particularly for close-range work.
- Better to shoot extra frames that than too few frames. Not all frames have to be used for the stacking process, but too few frames can make a real mess of things. Circular objects or wide gaps in distance require more frames to avoid troublesome overlapping blur haloes, which confuse the stacking software.
Article continues for subscribers...
Diglloyd Making Sharp Images is by yearly subscription. Subscribe now for about 13 cents a day ($50/year).
BEST DEAL: get full access to ALL 8 PUBLICATIONS for only about 75 cents a day!
Diglloyd Making Sharp Images articulates years of best practices and how-to, painstakingly learned over a decade of camera and lens evaluation.
Save yourself those years of trial and error by jump-starting your photographic technical execution when making the image. The best lens or camera is handicapped if the photographer fails to master perfect shot discipline. High-resolution digital cameras are unforgiving of errors, at least if one wants the best possible results.
- Eases into photographic challenges with an introductory section.
- Covers aspects of digital sensor technology that relate to getting the best image quality.
- Technique section discusses every aspect of making a sharp image handheld or on a tripod.
- Depth of field and how to bypass depth of field limitations via focus stacking.
- Optical aberrations: what they are, what they look like, and what to do about them.
- MTF, field curvature, focus shift: insight into the limitations of lab tests and why imaging performance is far more complex than it appears.
- Optical aberrations: what they are, what they look like, and what to do about them.
- How to test a lens for a “bad sample”.
Intrigued? See Focusing Zeiss DSLR Lenses For Peak Performance, PART ONE: The Challenges, or (one topic of many) field curvature.

